Documentation Index
Fetch the complete documentation index at: https://qodex.ai/docs/llms.txt
Use this file to discover all available pages before exploring further.
1. Sign Up
Go to app.qodex.ai → Create your account → You’ll land in AI Agent.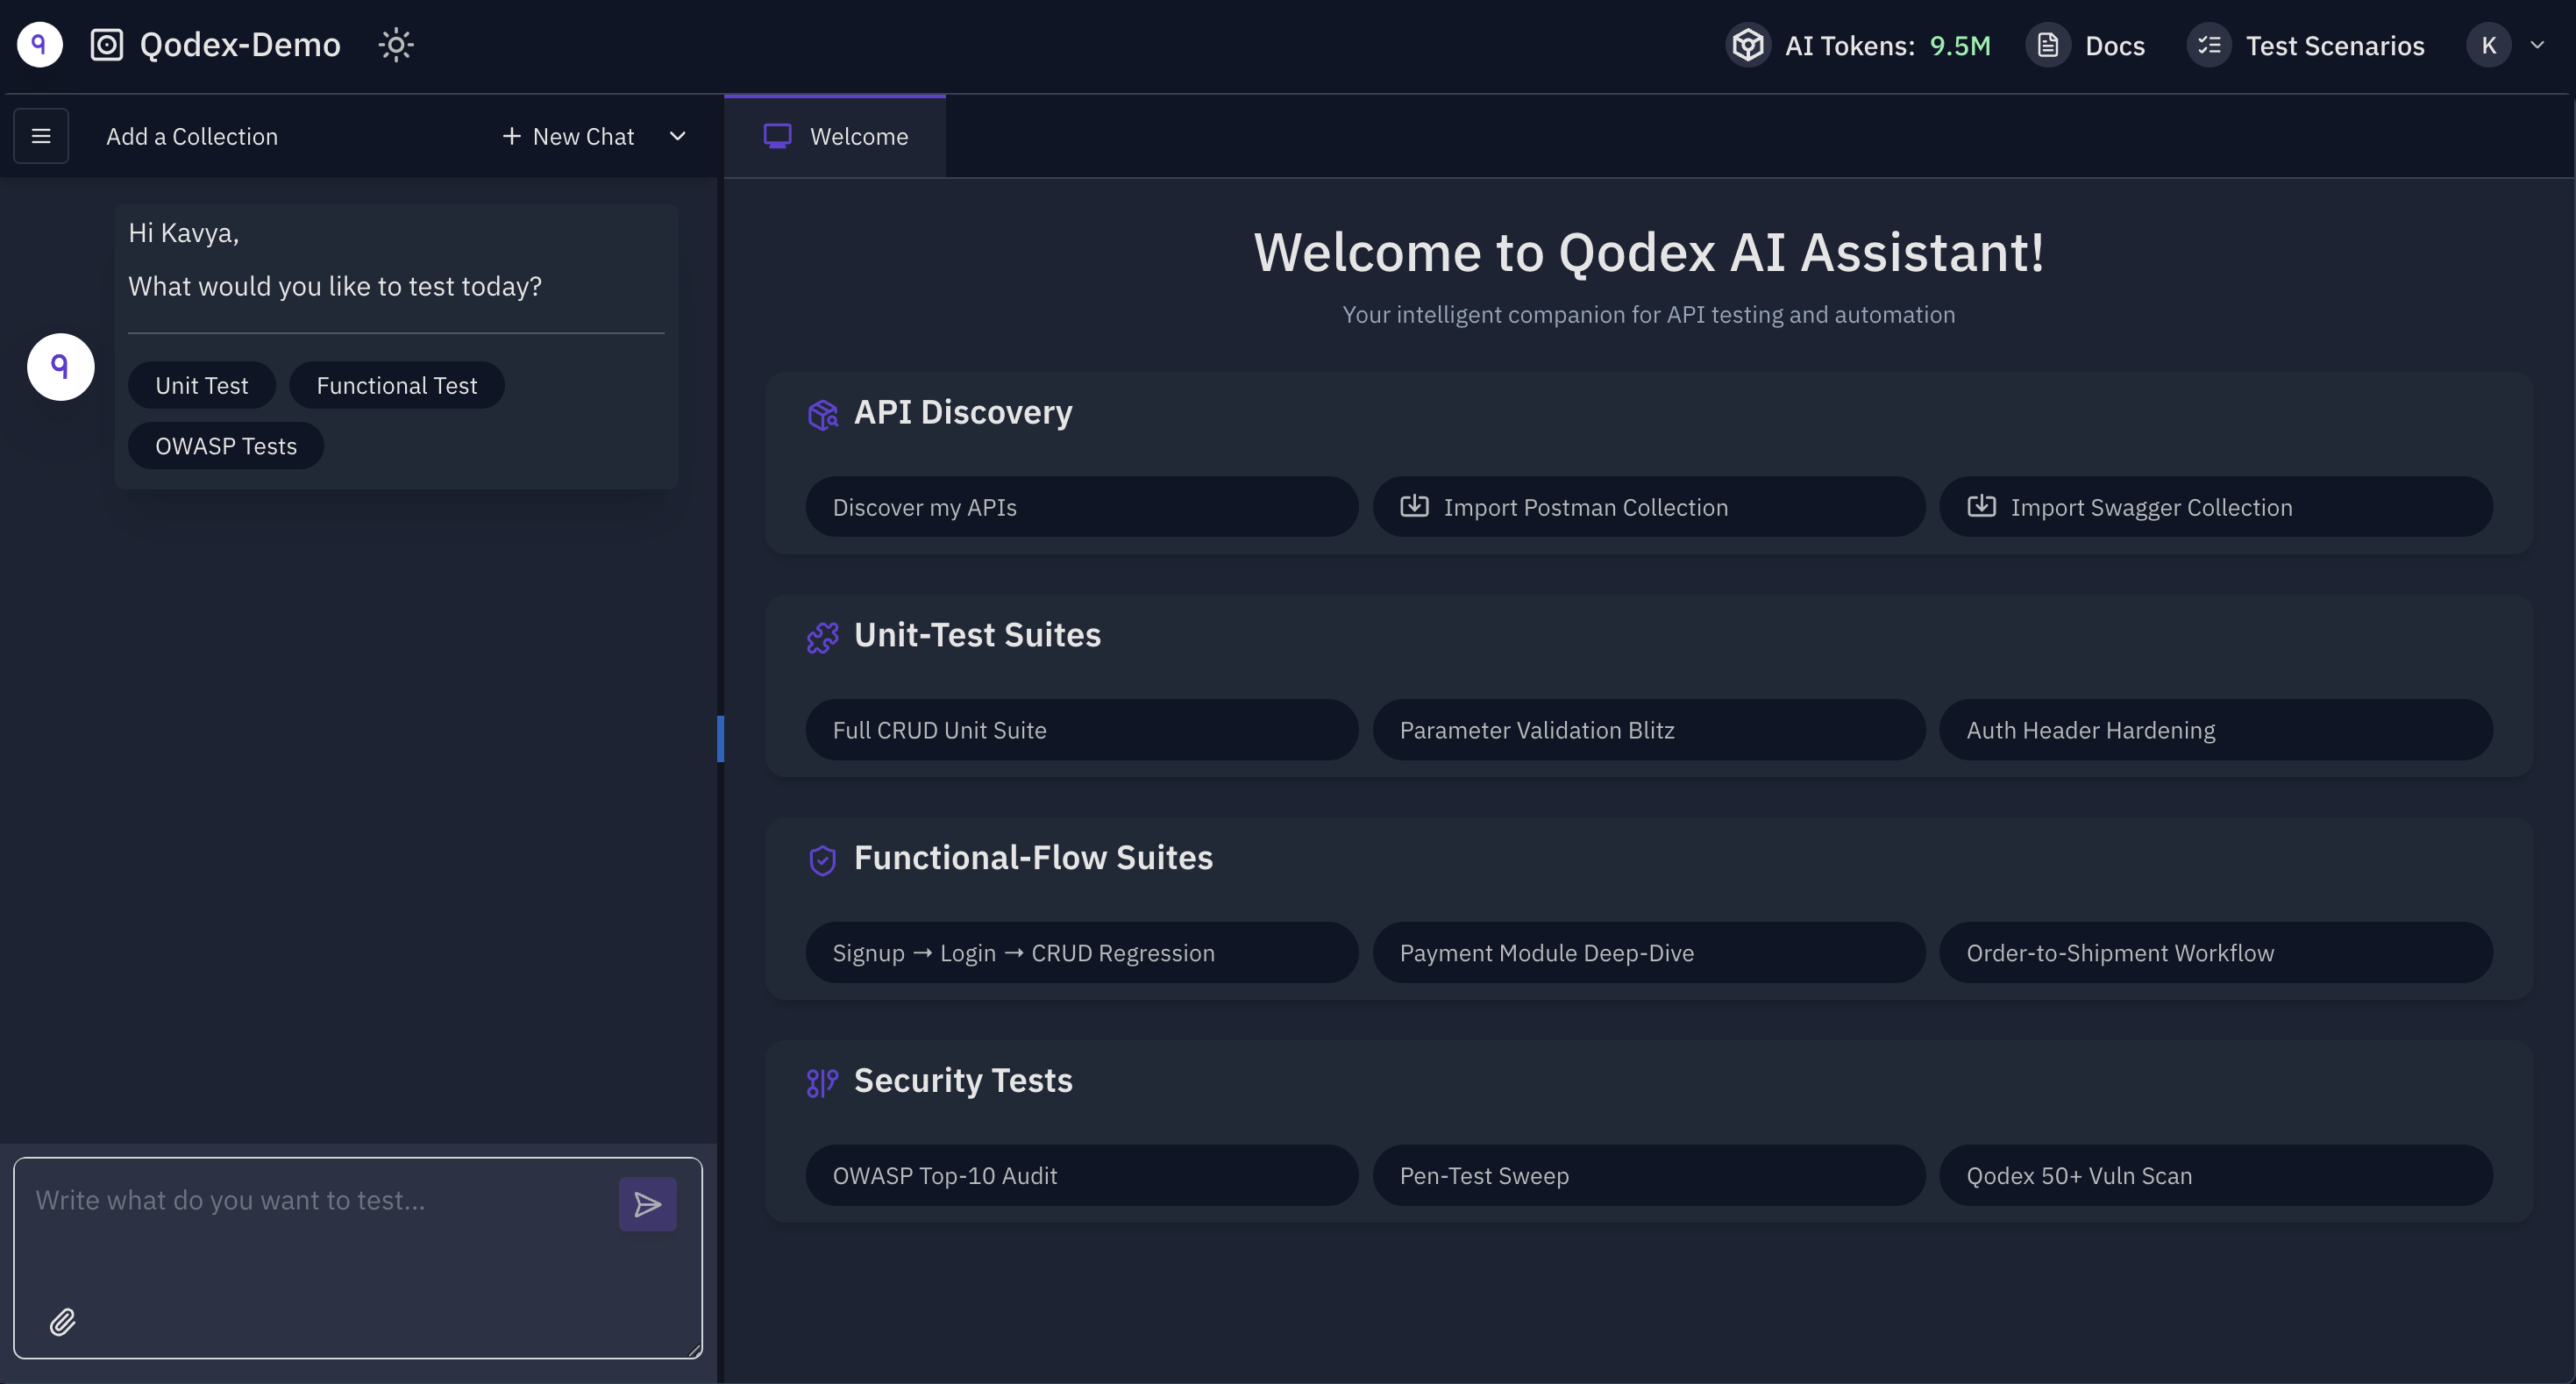
2. Import or Discover your APIs
In the top-left dropdown, click “Add Collection.” You can upload:- Postman Collections (.json)
- Swagger/OpenAPI files (.yaml, .json)
- Or use our API Discovery SDK (if no spec is available)
3. Generate Test Scenarios in Chat
In the AI Agent chat, describe what you want to test using plain English. Example prompts:- “Test login with valid and invalid credentials”
- “Check error response when email is missing in signup”
- “Verify token expiration and redirect on protected routes”
- A list of proposed test scenarios
- An option to confirm and save
4. Generate Request Data (AI or Manual)
Once your scenario is created:- Click “Create Request Data” in the scenario page
- The AI will auto-generate request payloads, headers, query params, etc.
- You can edit any of this manually as needed
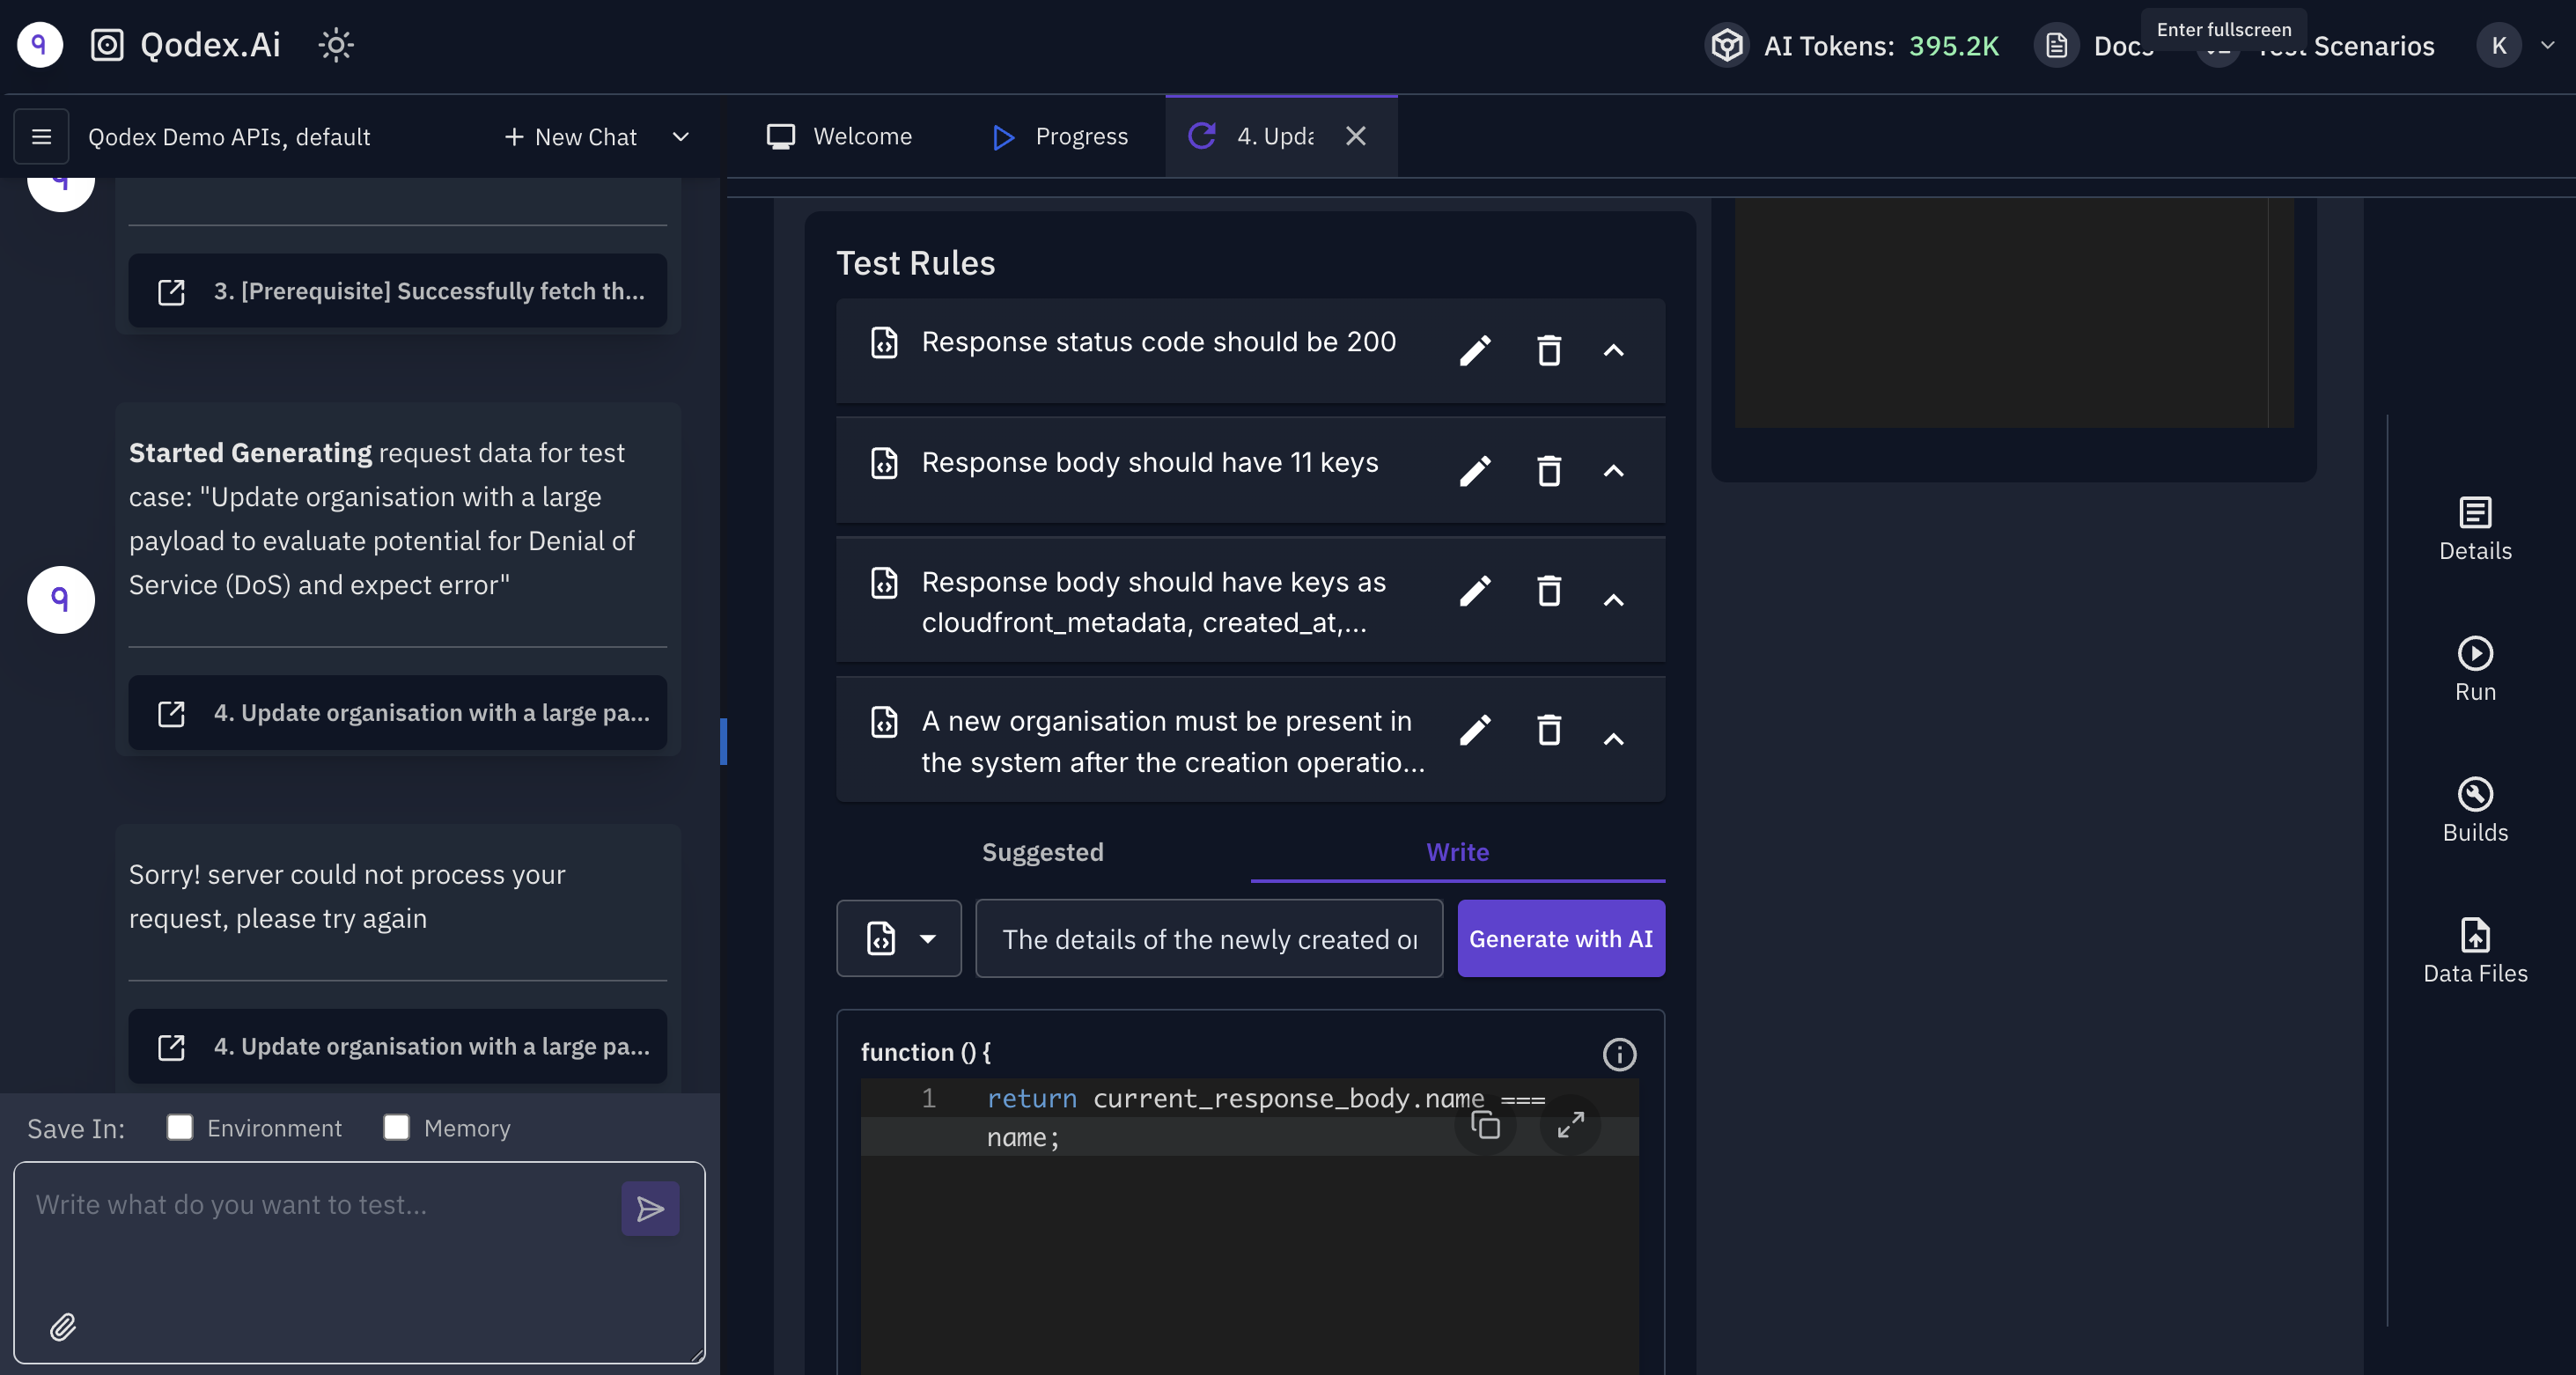
5. Apply or Write Test Rules
Scroll to the Test Rules section under each test case. Here you can:- Use AI-suggested rules (auto-populated for common validations)
- Write your own custom rules in plain English (e.g., “Response time should be < 1000ms” or “Status should be 401 if token is invalid”)
6. Run Your Tests in One Click
Click Run on any individual test scenario — or run an entire suite. Before running:- Select your environment (e.g., staging, production, QA)
- Ensure request data is populated
- Hit Run

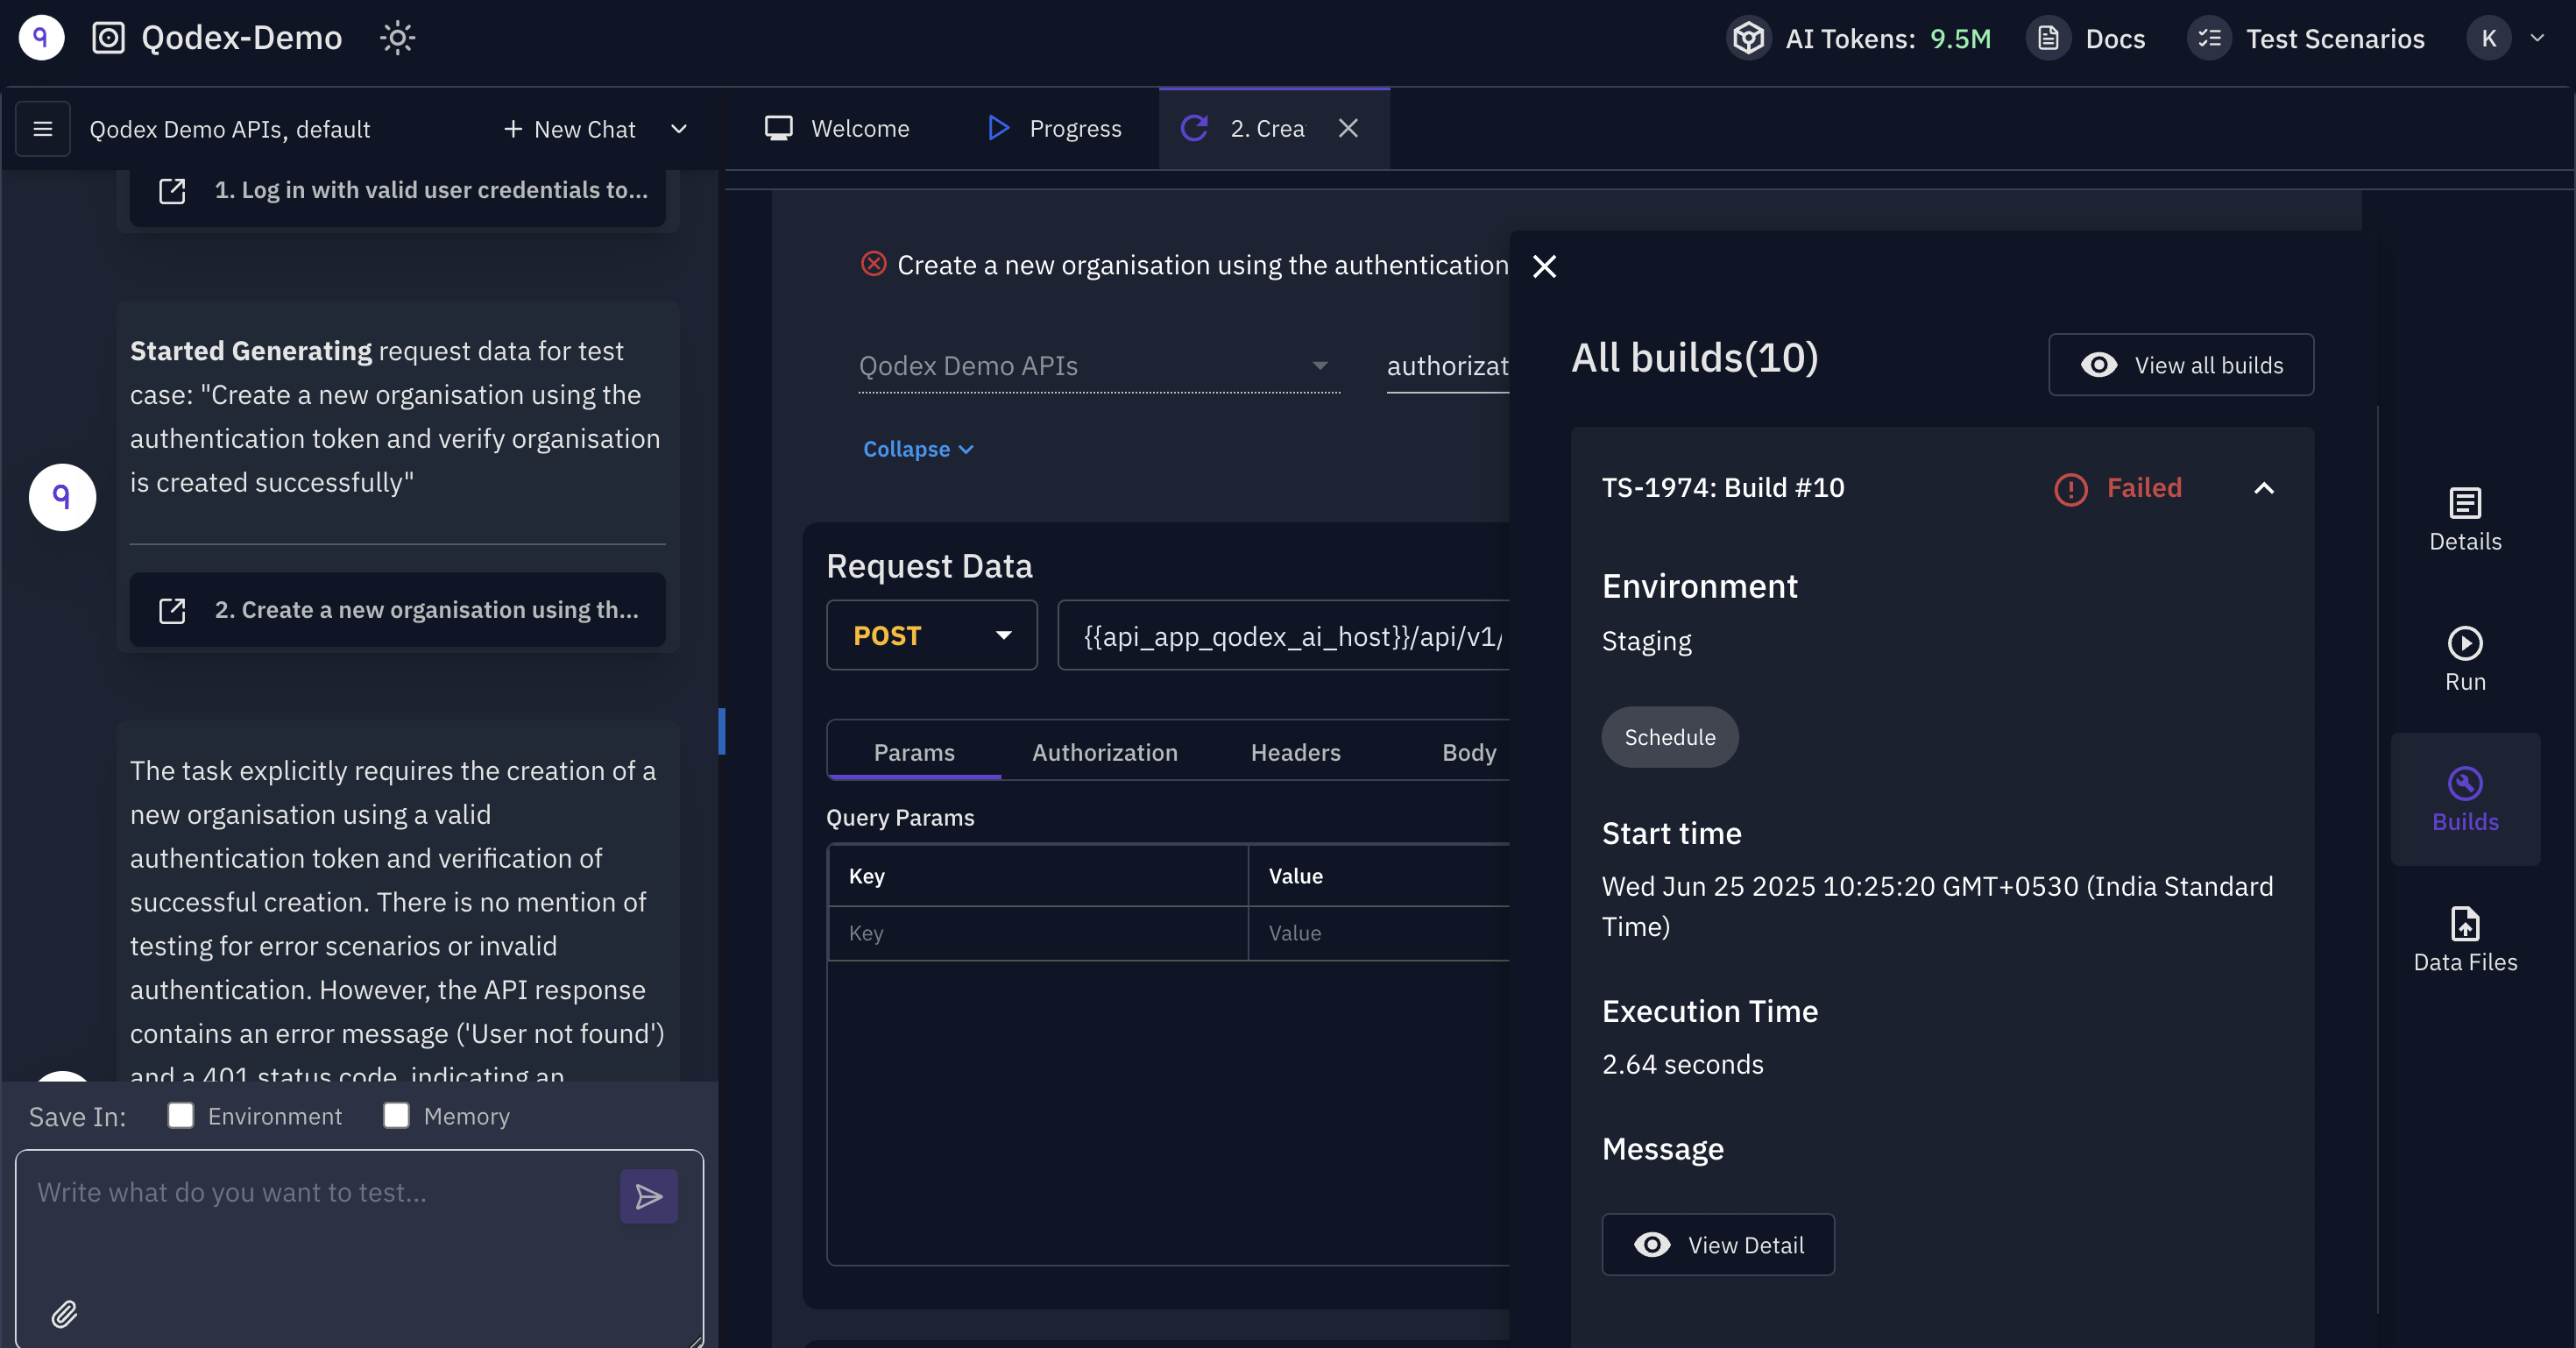
7. Debug Failed Tests with “Fix Me”
If a test fails:- You’ll see a red ❌ in the Build Report
- Click “Fix Me” to ask the AI why the test failed
- Get suggestions for how to update the request, test rules, or data
8. Sync with GitHub (Optional but Recommended)
From the Test Scenarios tab (click “Test Scenarios” in the top nav):- On the top-right, click “Sync to GitHub”
- Choose your repo and branch
- Version control of test logic
- Local test execution via CLI
- CI/CD integration with GitHub Actions
9. Create Test Plans & Schedule Runs
From the Test Suites tab:- Select active scenarios you want to run together and click “+Add to Test Suite”
- Select Suites you want to schedule and click “+ Add to Test Plan”
- Give the plan a name and define a schedule from the **Details **tab on the right
- Daily
- Weekly
- On every deploy (via webhook trigger)
That’s it — You’re Ready
You’ve now:- Uploaded your APIs
- Created test scenarios
- Generated data and rules
- Run tests
- Set up alerts & version control
Need Help?
- 💬 Chat with us in the app or email support@qodex.ai
- 📅 Book a 1:1 Call
Frequently Asked Questions (FAQs)
- What is Qodex.ai? Qodex.ai is an AI-powered API testing and security platform. It generates test scenarios, request data, and validation rules from plain English and auto-heals broken tests after backend changes.
- Who is Qodex.ai for? It’s built for developers, QA engineers, and SDETs working with modern API stacks. Whether you’re writing tests from scratch, scaling CI coverage, or improving security posture - Qodex can help.
- How do I start testing my APIs? Import your Postman or Swagger collection, describe your test in English (e.g., “write positive test for login flow”), and Qodex will generate the rest. You can run it immediately or schedule it.
- Can I use Qodex without writing any code? Yes — you can write plain-English prompts to generate test scenarios, data, and rules. No scripting is required unless you want full control (e.g., custom JS functions or database rules).
- How does Qodex generate test scenarios? It analyzes your API collection to build a dependency graph and uses fine-tuned AI models to create test steps, requests, and validations based on your prompt.
-
What types of tests can I create?
- Functional (positive/negative flows)
- Security (OWASP Top 10, Penetration)
- Edge case + failure handling
- Data validations (including database checks)
-
Can I write custom test rules?
Yes. You can write them in plain English like:
“response status should be 200”
The system converts them into executable logic (e.g., JS rules or DB validations).
“user in database should match the response user ID” -
How do I run tests?
- From the Web UI
- Using the Qodex CLI
- Inside your CI/CD pipelines
- On a fixed schedule (via Test Plans)
- What does auto-healing mean? When tests fail after a backend change, Qodex compares past and current builds, detects why the failure happened, and suggests fixes for outdated test rules or validations. You can apply the fix with a single click.
-
How are AI tokens used?
AI tokens are consumed every time the AI is used, which includes:
- Test scenario generation (from prompts or test cases)
- Rule writing or updating (AI-assisted validations)
- Test data generation
- Auto-healing failed tests
- Partial response parsing or advanced analysis
-
What happens when a test fails due to a backend change?
You don’t have to manually debug and update every test.
Qodex’s Auto-Healing Agent:
- Analyzes the diff between previous and current builds
- Identifies failing rules or changes in response
- Suggests fixes (like rule corrections or schema updates)
- You review → click “Fix” → done.
- How is pricing calculated? You pay only for AI usage (test generation or healing). Running tests doesn’t consume tokens. Pricing starts at $100 for 10M tokens + 10k test executions
-
Is everything hosted on the cloud?
Yes, Qodex.ai is primarily a cloud-native platform. Your test suites, builds, and project state are securely stored and executed on our cloud infrastructure.
However, we support:
- Running tests locally via CLI
- CI/CD integration
- Private GitHub sync for full developer control
-
Is my API data safe with Qodex?
Yes. Qodex is built with security-first principles:
- End-to-end encryption (in transit and at rest)
- Isolated project-level data
- Zero data shared with any third-party AI tools
- Full audit trails and build logs
-
Do you sign NDAs or DPAs?
Absolutely. We offer:
- Mutual NDA upon request
- DPA (Data Processing Agreement) for enterprise or SOC 2 compliant workflows
- Optional custom agreements for enterprise clients
-
Can I run tests locally instead of the cloud?
Yes! You can:
- Run test suites locally using the CLI
- Define custom environments like dev, staging, or local
- Sync tests from GitHub and run pre-commit validations This gives developers full control without waiting on CI pipelines.